How to Mount ISOs on Linux using Terminal.
2 December 2022ISO is a widely popular disc image format. It is an archive that contains the image of a disc, ie. the data that is present on an optical disc. There are many applications that can help you create and access ISO files. Talking about Ubuntu and other mainstream Linux Distributions, they can mount ISOs using Archive Mounter and other such softwares. This tutorial is for few that don’t have them, or for the ones who’d just like to play around with Linux in a geeky way.
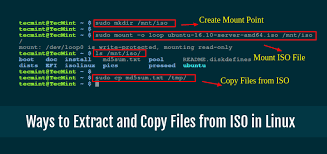
- The first thing that you need for mounting devices is a Mount Point. Think of a mount point as a cloth hanger, and the device/file as your clothes – if you need to hang your clothes, you need a hanger. Similarly here, we need a Mount Point to mount our image to. Note that you need root privileges to create a mount point. Get into the terminal and type “su” to login as a super user. Next, use this command to make a mountpoint: mkdir /mnt/iso
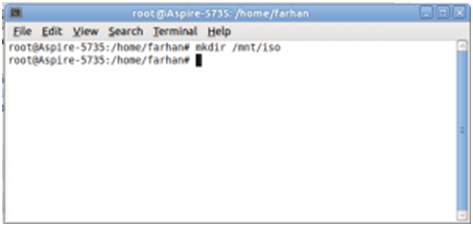
Make a Mount Point
- Browse to the directory that has the .iso file you want to mount. Use this command cd [directory path] for example, if your file is in /media/1234, type cd /media/1234 This command would take you to the desired directory. Once you’re in, we need to just point to the ISO and tell Linux to mount it to the mount point that we had created earlier. To do so, use this command: mount -o loop isoname.iso /mnt/iso
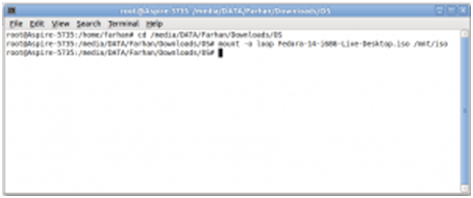
Table of Contents
Change Directory and Mount ISO
- The ISO is now mounted at the desired mount point. To unmount it, use this command: umount (mount-point), which in our case is umount /mnt/iso
Note: We have used the loop function which enables you to read or write filesystems such as that of an ISO. You won’t be able to mount the ISO without the loop function.
Please follow and like us: